
We did the invitations little by little, starting from a few weeks ago. Of course, the first step is to conceptualize the package, the content, the format, the look. After deciding on how it will look like, what materials to use and where to buy them, we bought the materials from Veco Paper Corporation (specialty boards and paper cutter), National Bookstore (stencil and printing materials) and some other merchandise stores.
We started by cutting the very large specialty boards into our invitation size + 0.5-inch allowance on all sides. This was made more difficult than I expected by our two paper cutters (one that has a very blunt blade, and one that is very small)
 |
| May 13, 2011 |
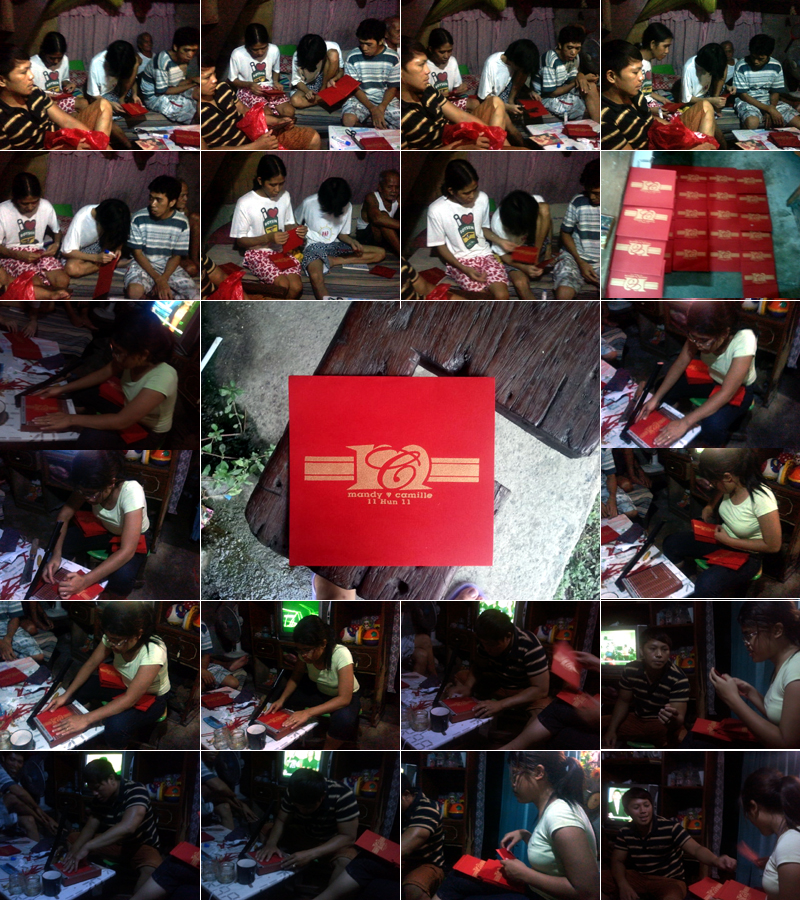
Then, I started drafting layouts, choosing between borders, backgrounds, font faces, color shades, etc. We even conducted a mini survey on the nicest background and border. After finalizing the design, we printed them out and then individually cut the area outside the crop marks. Next, I designed the print that will go in the stationery cover/envelope. And this is what I made.

I requested my painter uncle to do a silkscreen pattern out of this and then I employed the help of my cousin to print this into the red cut-outs. Using gold poster color and a squeegee, we were able to make a masterpiece. Each transfer of paint was a very glorious moment for us because it didn't look as cheap as the materials we used. The tedious part in this is the folding, trimming and gluing of the sheets of board to turn them into envelopes. We did this for one whole day.
 |
| May 23, 2011 |
Another tedious process is creating the guest list, writing down the number of reserved seats and assembling the whole invitation package, because we have to do everything individually.
 |
| May 27, 2011 |
After all the hard work, this is what we were able to create: a three-fold square invitation with a photo cover, elegant inside pages and the RSVP page at the back.


No comments:
Post a Comment